Here we are going to store the events captured in the last post in a database. The steps are as follows
- Create a Django test server
- Build a events app which exposes the events url which will accept POST requests from the AJAX call described in the previous post
- Create a model or database template which has events field
- Install mySQL server to avoid database switching headaches later on
- Accept the events and store in our database in raw form
To accept events, we will require a persistently running server. That purpose is fulfilled by Django
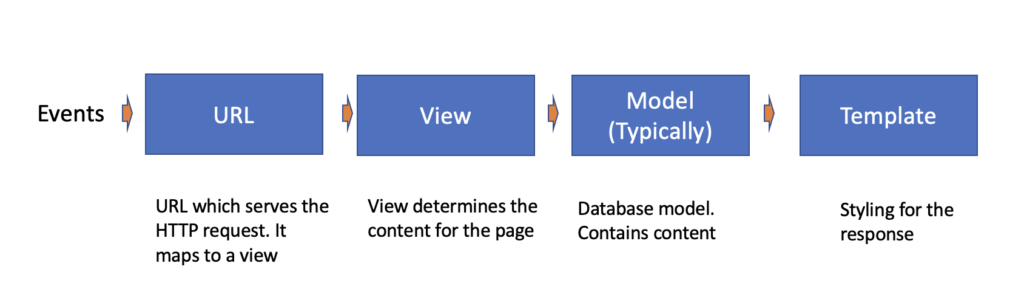
Django follows a Model-View-Template architecture.
Create Django app – events
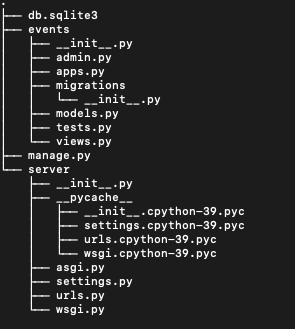
Now I will create a Django project and an app called events. Django project contains all apps while apps do specific standalone functions in a web service like authentication or in this case, handling events. We will add more functionalities and other features as different apps later on. Following command will give me this structure
python manage.py startapp events
We will need to add urls for events to handle the post requests coming in from the website. Also these URLs will then send the data to a database which will contain the raw events data that is stored in the form that it is sent in.
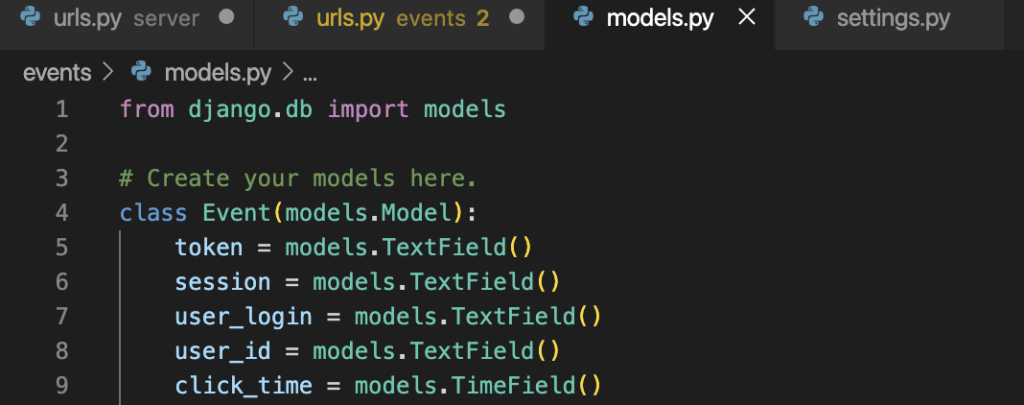
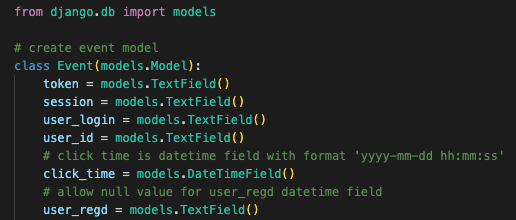
In the models.py of events apps, we will create a database model with the fields
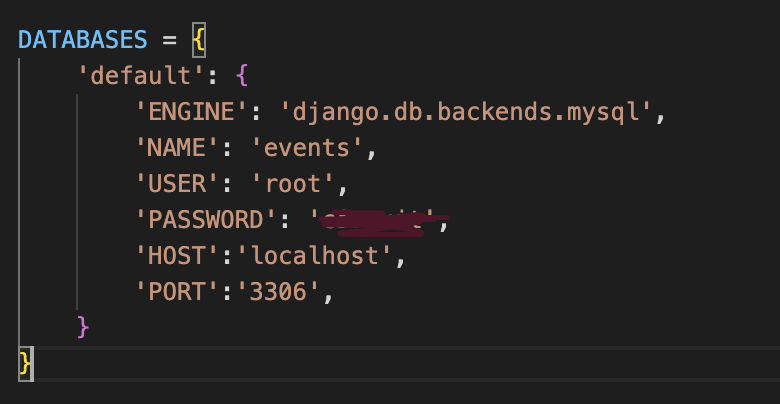
Install MySQL server and integrate with Django
This post has a step by step guide to do that. We could have used SQLite DB for our test run, however it doesn’t allow remote access in addition to being cumbersome with users. Previous experience gave a big migraine in migrating databases, hence going to use production databases from the word go
Here are all the steps to follow for installation of mysql as I faced a bit of bother installing on macos
// Install mysql from homebrew
$ brew install mysql

// run secure installation - Say yes to everything
$ mysql_secure_installation

// Add sql client to path
$ echo 'export PATH="/opt/homebrew/opt/mysql-client/bin:$PATH"' >> ~/.zshrc
$ source ~/.zshrc

// Install mysqlclient - python connector to mysql. Allows Django // to interact with mysql
$ pip install mysqlclient

/*However was getting this error "xcrun: error: invalid active  developer path (/Library/Developer/CommandLineTools), missing xcrun at: /Library/Developer/CommandLineTools/usr/bin/xcrun". To solve for this, we need to ensure XCode is identifying the command line

Open XCode
Open Preferences (⌘,)
Go to Locations tab
For “Command Line Tools” select the current version
*/
// Finally install mysqlclient
$ pip install mysqlclient

// create database events
mysql>CREATE DATABASE events
Whew! Finally am able to run mysqlclient. This gives an indication of how much time it takes to setup the infra for code to run vs time to actually code
Accept events in Django database
Now lets move on to the final part of this post i.e accepting events from our events collected by the JS file in the client (previous post)
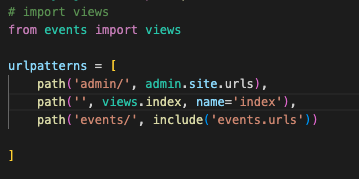
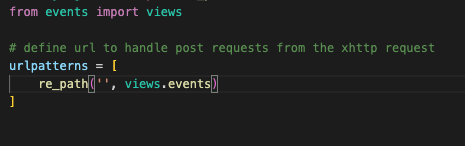
First we create the urls.py file in both the main server and events app to direct the URLs to our configured view
Main URLs directs to include events.urls
Events URLs directs to views.py
Next we write a view to handle the incoming POST request in views.py
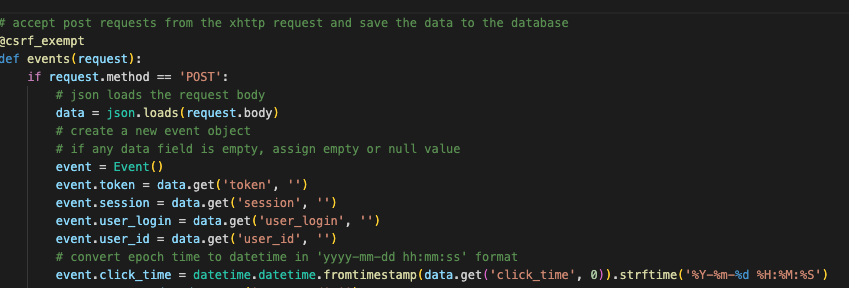
Few points to note here
- @csrf_exempt decorator is important and I had to spend an hour to figure out why I was getting forbidden error. We will figure out a way to make it more secure later
- I am creating an event class imported from models (which we’ll create in the next step) . Each attribute of this class corresponds to the data sent, and we need to explicitly assign empty string otherwise database will throw an error
We will create a model corresponding to the event data
Finally, something that took the most amount of time for me – solve for access issues. Note that both the javascript and django is residing in localhost for now. However in order to enable Django to accept requests, we need to do the following
1.Install django-cors-headers using PIP. This allows cross origin site requests
$ pip install django-cors-headers

2.Add corsheaders to installed applications section in the settings.py file

3. Add corsheaders.middleware.CorsMiddleware to middleware section in settings.py file

4.  If you want to allow access for all domains, set the following variable to TRUE in settings.py file:
CORS_ORIGIN_ALLOW_ALL = True

5. For Google chrome, you will need to disable the feature which disallows http requests found here
chrome://flags/#block-insecure-private-network-requests
To enable the database creation, do the following
- $python manage.py makemigrations
- $python manage.py migrate
Run the server on port 8000
$python manage.py runserver 8000
Now if you click on the wordpress site (in my case its this website, we should be getting clicks stored in our database event_raw

This brings us to the close of the second part. Several things remain to be done mainly deployment which we’ll cover in the third part.